In this article, we want to share beadwork training in different ways, and we have posted several video tutorials for better learning.
It is one of the beautiful and traditional embroidery of Iran. In very distant times, they decorated their tents, carpets and clothes with jewels, this work turned into the art of beadwork throughout history. It seems that this art had an aristocratic aspect in the past and the raw materials used were precious stones and metals that were made in the form of beads. Maybe the ordinary classes of society also benefited from this art by using stones or other cheap materials.
Beadwork training videos
Beaded bracelet tutorial
Video embroidery AND Beadwork training on net
Letter D Beadwork training video
Leaf Beadwork training video
Brooch Beadwork training video
What is beadwork?
Beadwork or beadwork is one of the handicraft and decorative arts. Beads are small decorative and colorful beads. Manjooq is pronounced as Zam Mim and Fateh Mim. Beaded embroidery is one of the traditional Iranian embroidery that has been used to decorate all kinds of clothes, tents, etc. Bead embroidery on fabric is one of the traditional arts and one of the easiest ways to decorate all kinds of gowns, mantles and art panels, which can be done in a variety of ways.
The sewing of beads on the fabric has the ultimate beauty in the fabric. Sparkling beads bring a shine and dimension to the fabric that is unique. Embroidery basically means sewing beads on fabric with beautiful patterns. This embroidery is done with beads of different sizes and shapes.
History of beadwork
Beadwork has a very ancient history. The remaining historical works indicate that this embroidery was very popular during the Achaemenid, Parthian and Sassanid periods. They used to decorate clothes and tents with jeweled beads. During the time of the Mongols, this art was very common. Clavijo [1] wrote about this in his travelogue: “The walls of the palace where His Highness sat were all covered with red curtains, and on these curtains were beads of gold and rubies, as well as pearls and stones. Other precious things were sewn. This art in the 13th century. AH (Qajar era) was very important; A huge collection of bead embroidery of this period is available in the Museum of Decorative Arts of Iran, which is proof of this.
Teaching needlework
Types of sewing
Linear method: A row of beads is sewn on a continuous line.
Topor method: rows of beads are sewn together on a wide surface.
Leaf embroidery: The direction of sewing leaves is twill.
Fasten embroidery: This type of embroidery is used to sew panels, and it is one of the methods that is also used in the linear method. In this method, two needles and threads are used, one for threading the beads and the other for fastening on the thread through which the bead passes. This method does not have high strength.
Re-embroidery: In this method, the beads are sewn to the fabric twice. First, four beads are attached to a needle, they are inserted into the cloth, and from behind the cloth, the needle is taken out from the middle of them and passed through the last two beads for the second time. Today, this stitch is used a lot.
Beadwork is one of Iran handicrafts that has its fans.
Tools and equipment needed for Beadwork training
Bead size 4 mm
thread
needle
And a little interest
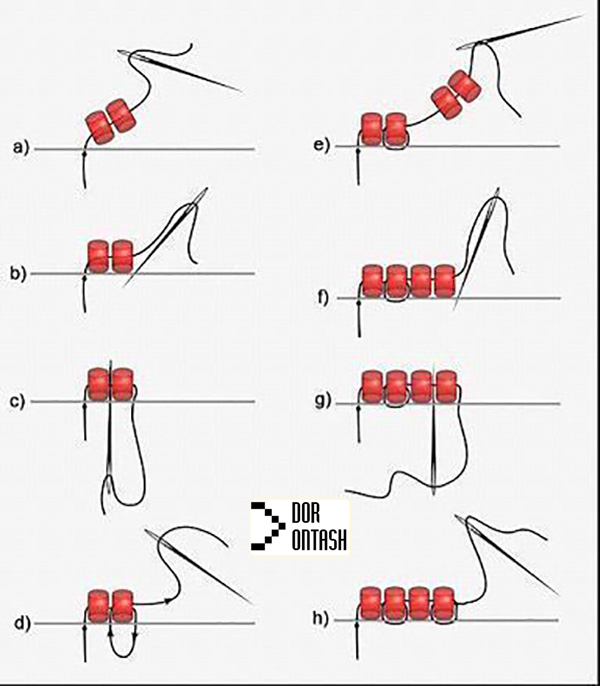
The steps of Beadwork training with a needle
The first stage
First, we take a piece of thread and insert it into the needle. Next, we pass the needle through a number of beads. And again we insert the needle into the bead and pass it.
The second stage
At this stage, we pass the needle through two other beads.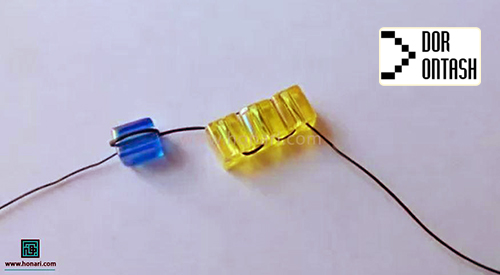
The third stage
And we also have to pass the thread from the second bead. like this:
third level
Now, in order to continue the work, we have to add another bead and when we pass the bead through the needle, we have to insert the needle into the side bead so that the beads are in a row.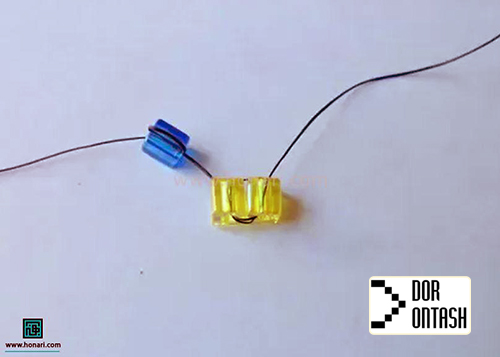
And again, we pass the needle through the bead that we inserted last time: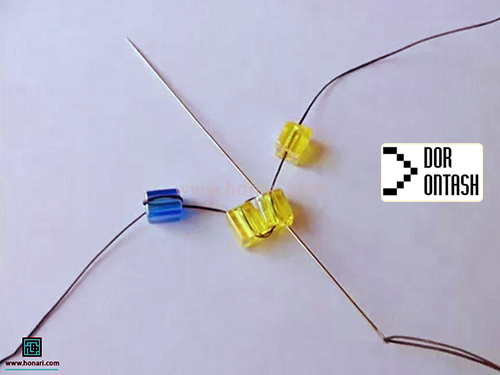
If you repeat the third step several times, it will look like this:
Now you have learned needlework. For better learning, I will leave you the video tutorial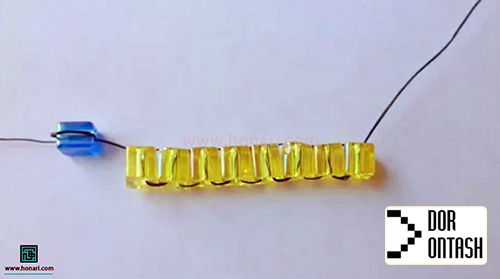
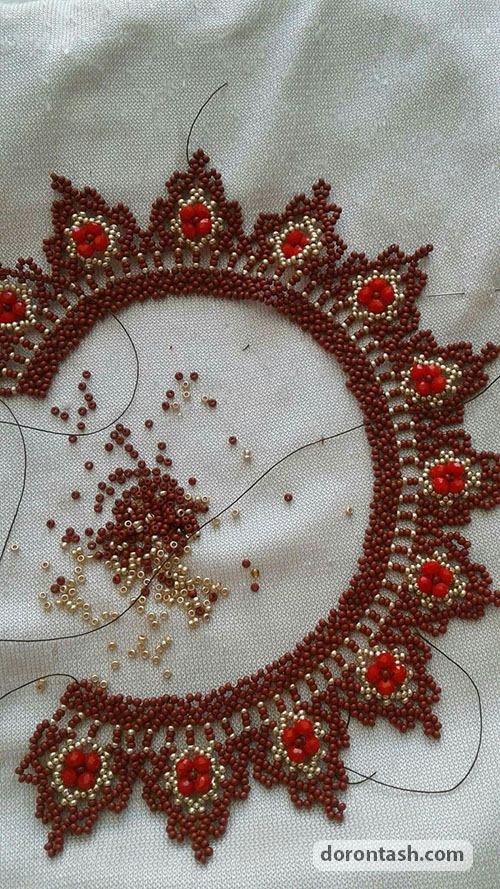
Table weaving Beadwork training tapestry
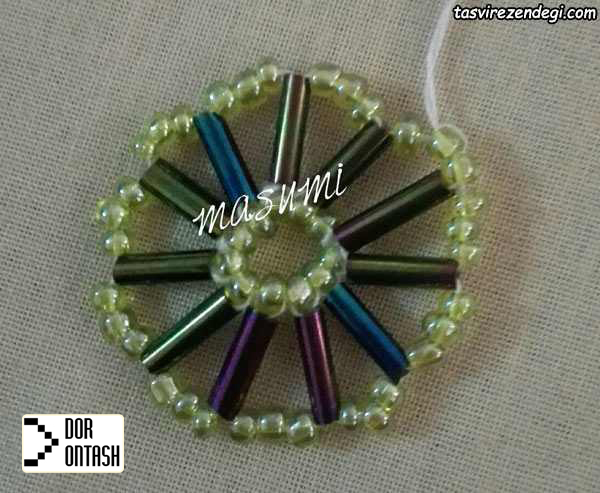
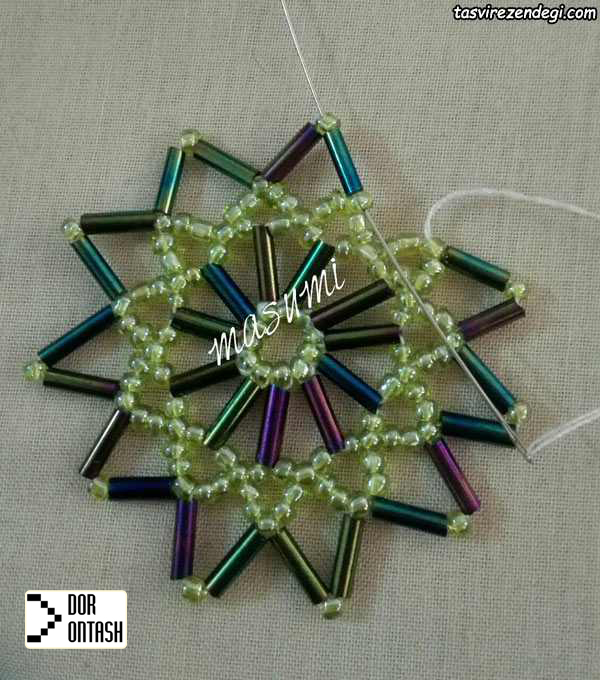
We prepare the thread and needle, pass 11 beads from the needle.
Pass the needle through the first bead we threaded again to make a circle.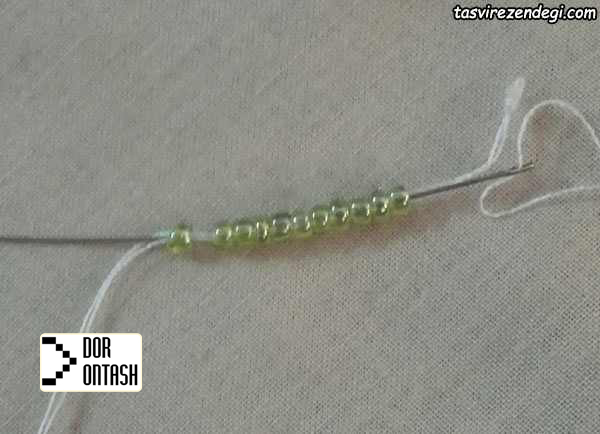
At this stage of learning how to embroider beads on fabric, after making a circle, we pass 1 tapestry, 3 beads and again 1 tapestry.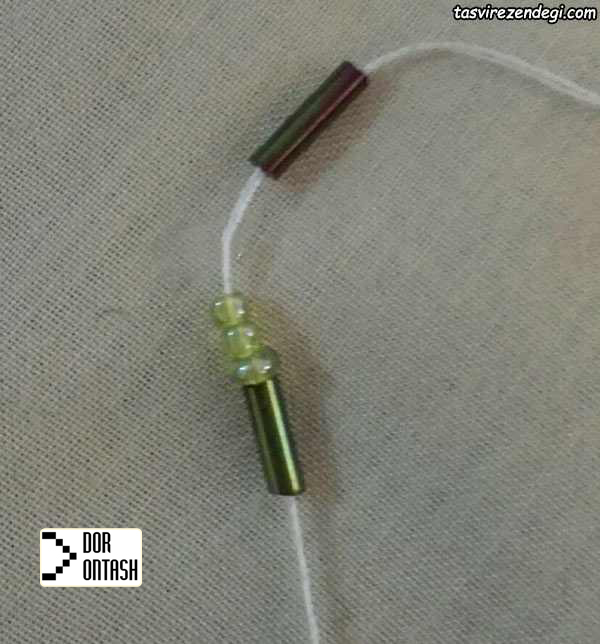
We pass the needle through the first bead.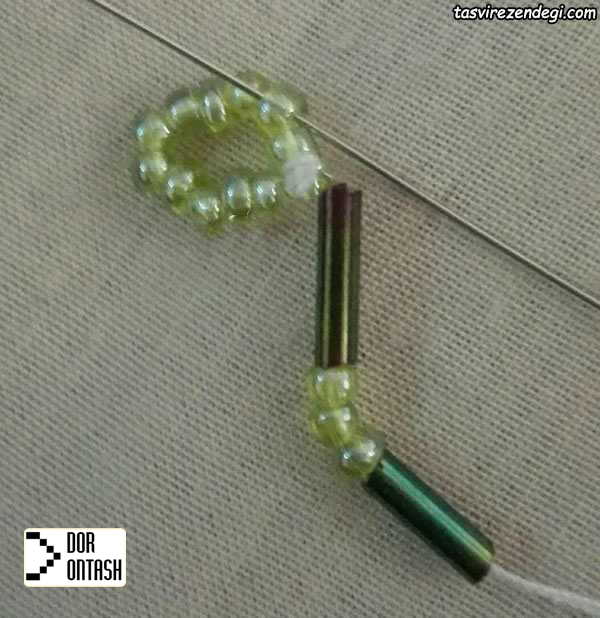
After passing the bead, turn the needle and again guide the needle upwards from the bottom of the tapestry.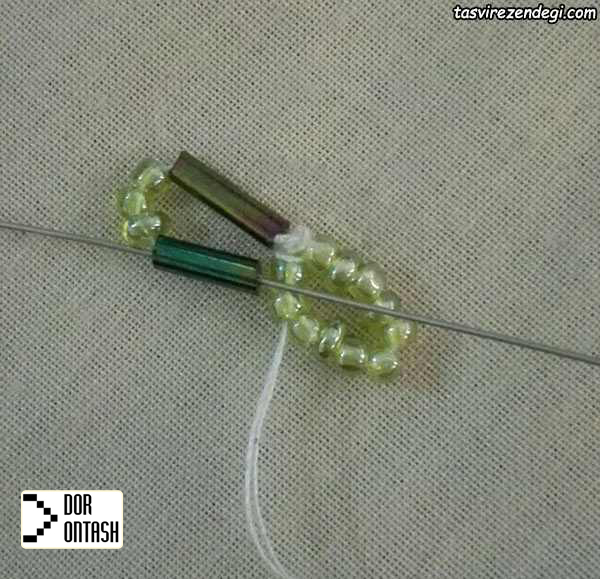
Now put 3 beads and 1 tapestry in the needle.
We pass the needle again from the bottom circle of the next bead.
Pass the needle through the tapestry again and direct it upwards.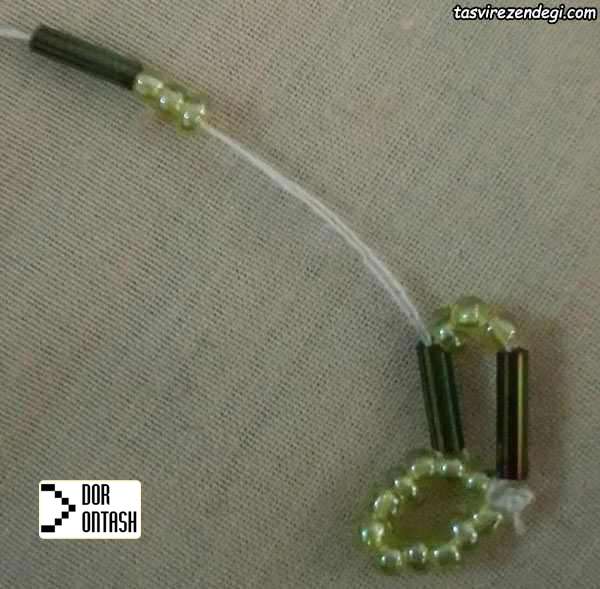
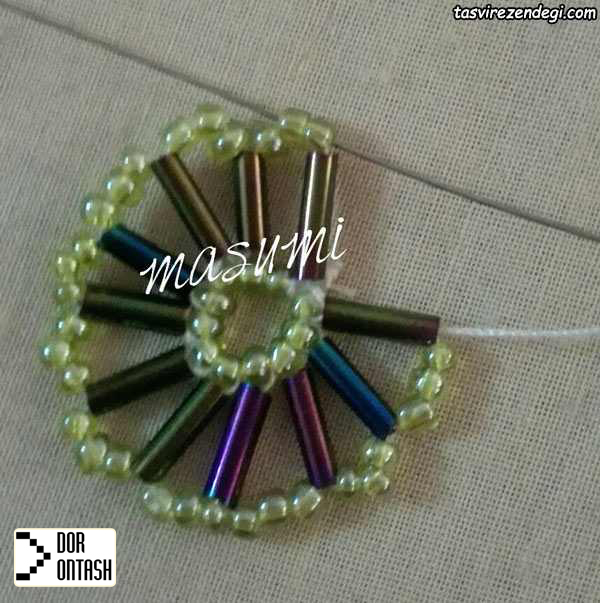
Do the weave all the way through.
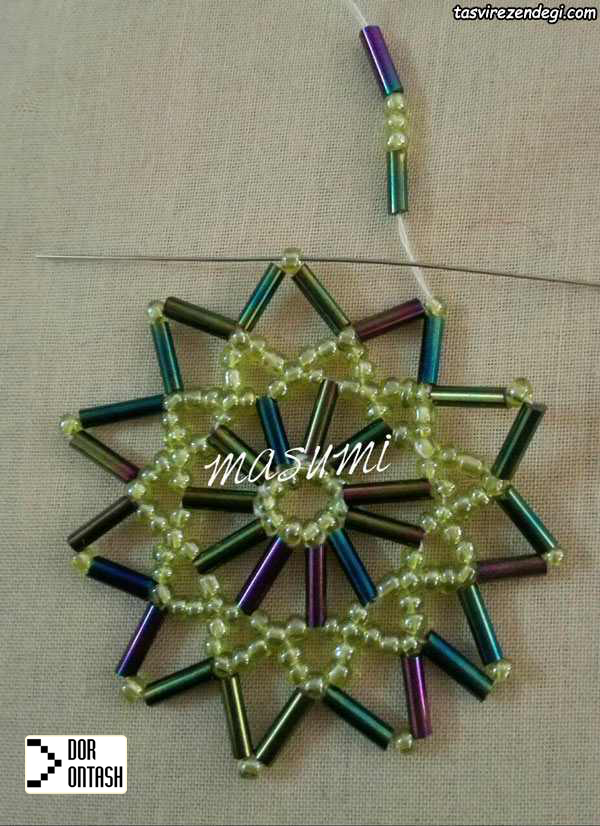
For the last row, insert 3 beads into the needle and make a row of 2 beads from the first braided beads, as shown in the picture.
 To fasten, once again we line the needle from the last bead to get a tight fit.
 Insert 5 beads into the needle and cross the middle bead of the previous row.
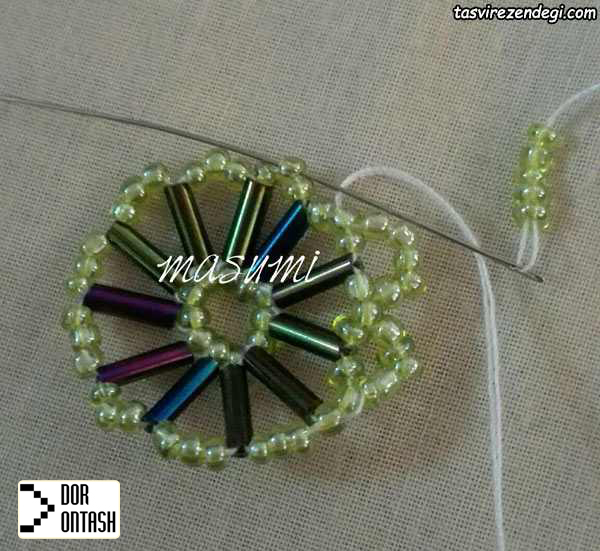 Do the weaving to the end. In the last step, pass the needle through the middle bead of the previous row, and 3 beads of the new row.
Like the picture.
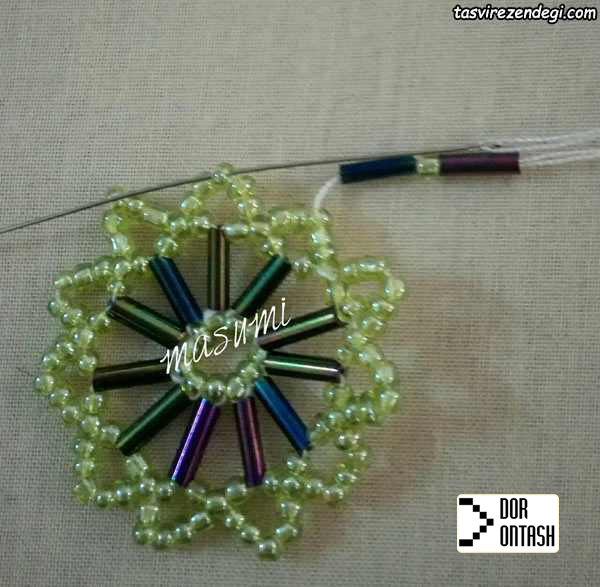 Now insert 1 tapestry, 1 bead and again 1 tapestry into the needle.
Skip the middle bead of the previous row.
 Continue to the end.
Place the needle in the middle bead of the previous row, and line the tapestry and bead.
Now insert 1 tapestry, 3 beads and 1 tapestry into the needle.
Pass the needle through the bead of the previous row.
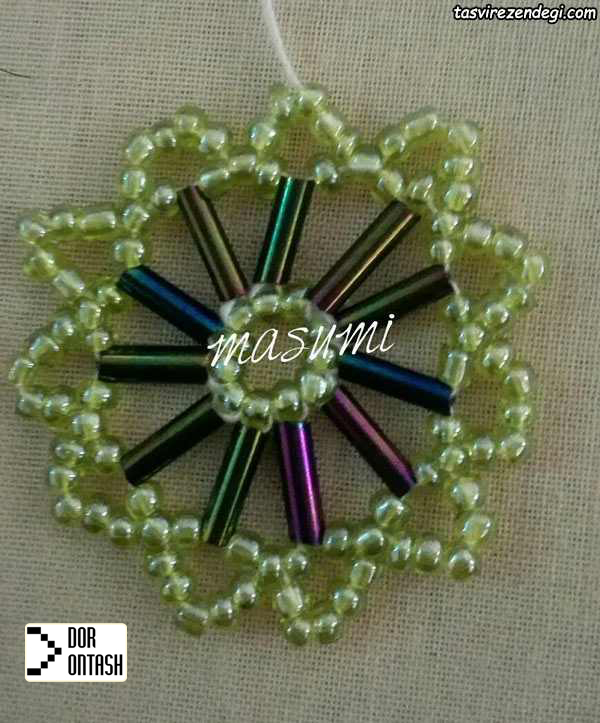
 Continue weaving until the end.
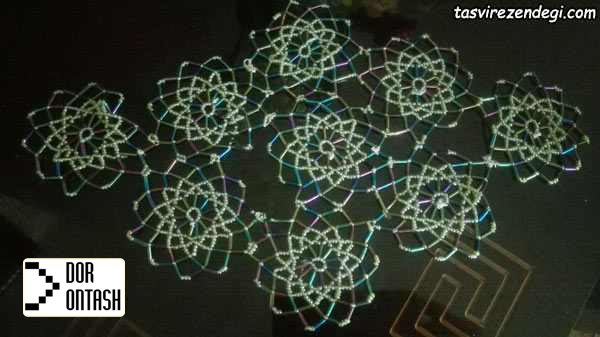
 Connect the woven motifs together and make a beautiful tablecloth.
Learning how to make a beaded brooch
 Materials needed to make a beaded brooch
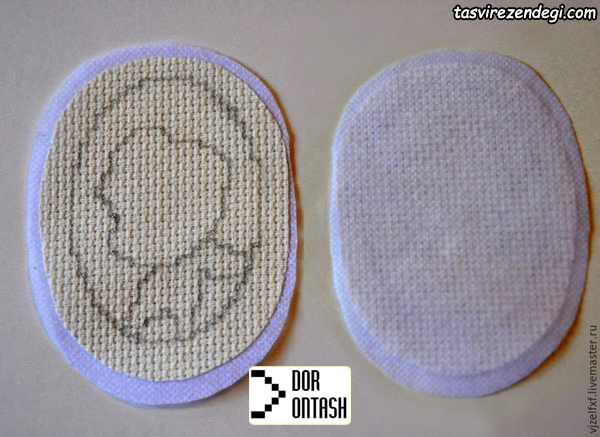
 Determine the circumference of the map according to the size of your medal.
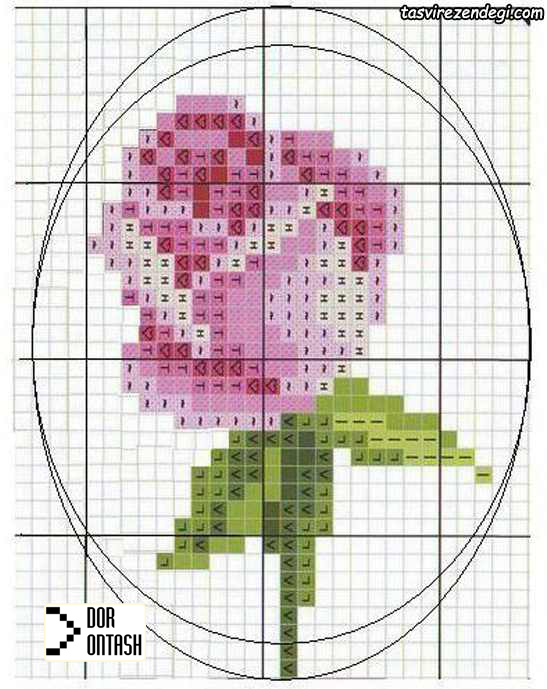 Stick the special needle fabric on the embroidered number and mark the area of your design and medal according to the map on the fabric.
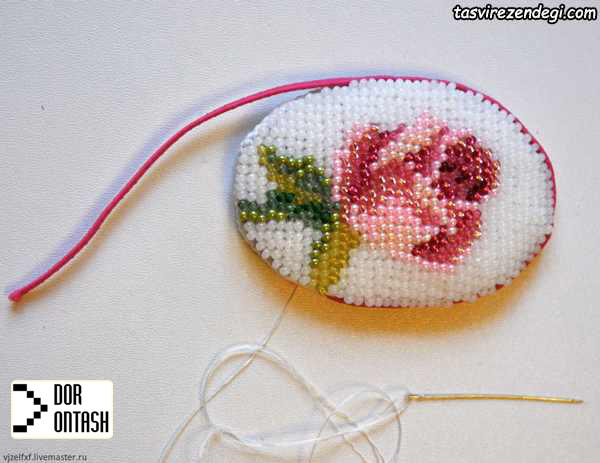
 According to the map and working circumference, start sewing the beads from the top of the map.
Pay attention to the place where the needle goes into the fabric.
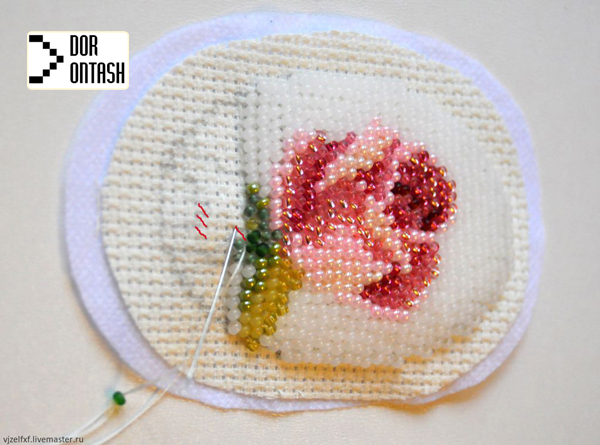 Sew the beads until the end of the map.
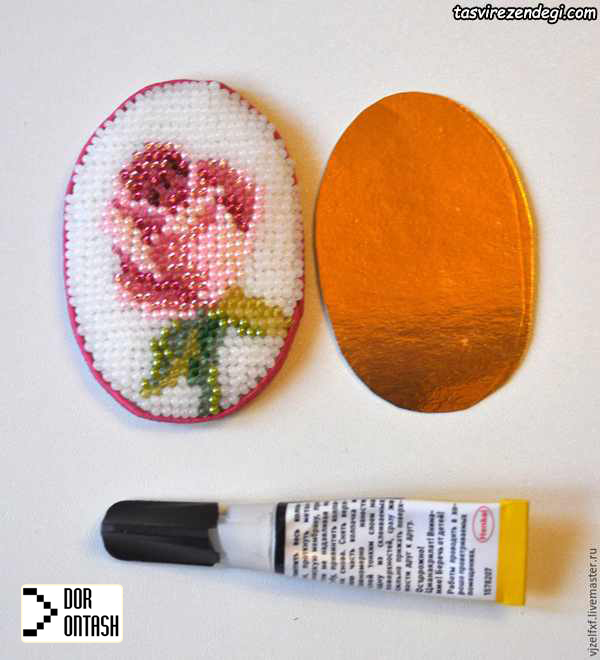
We cut a piece of cardboard for the back.
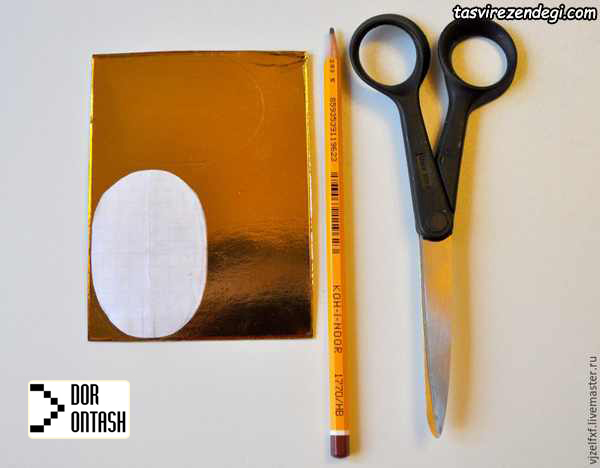 We cut a piece of compressed and thin fiber to the size of cardboard.
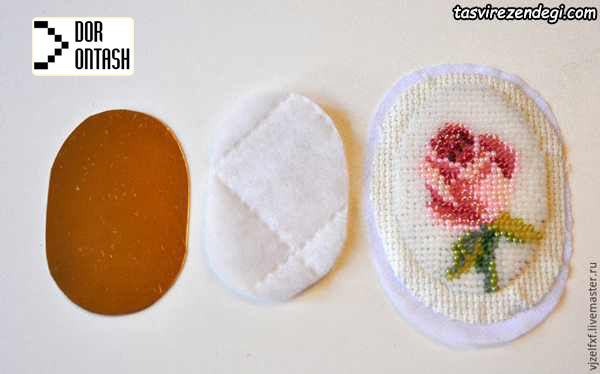
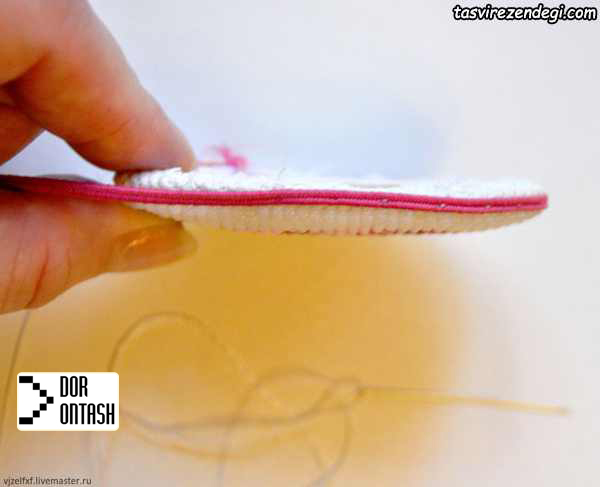
pay attention; According to the picture, we fix the cardboard and fibers on the back of our work with thread and needle.
 You sew around the work with a piece of grooved braid.
 How to sew a braid
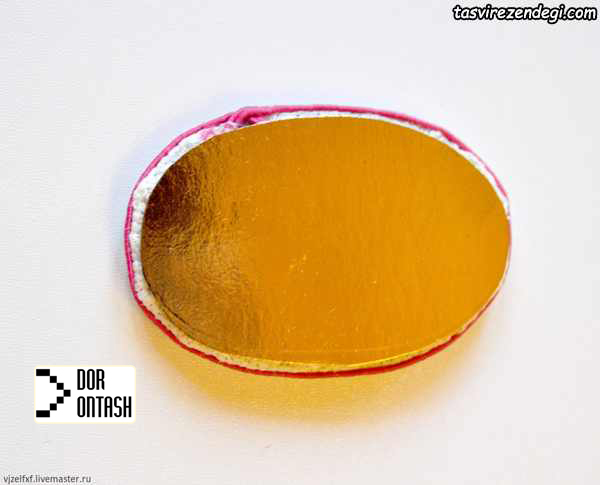
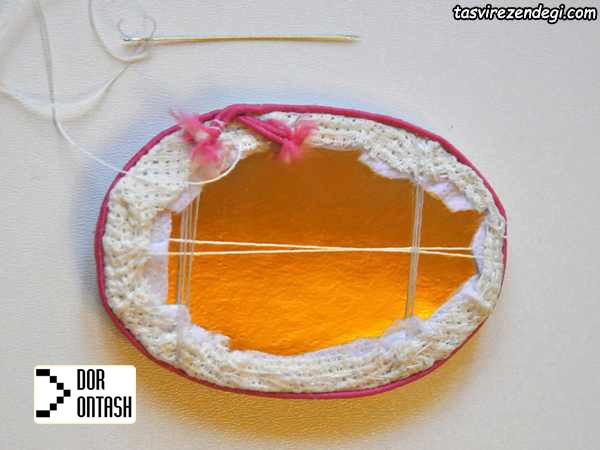 To cover and strengthen the body of the medal, stick another piece of cardboard behind the work.
 Of course, it should be about 2 mm smaller than the working circumference so that it cannot be seen.
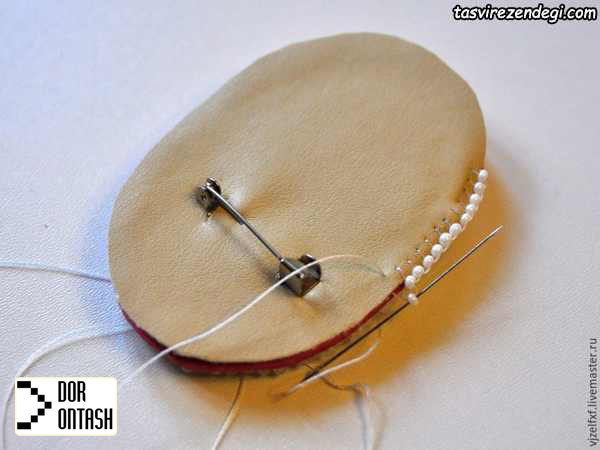
 On a piece of leather, mark the place of the brooch pin and cut it.
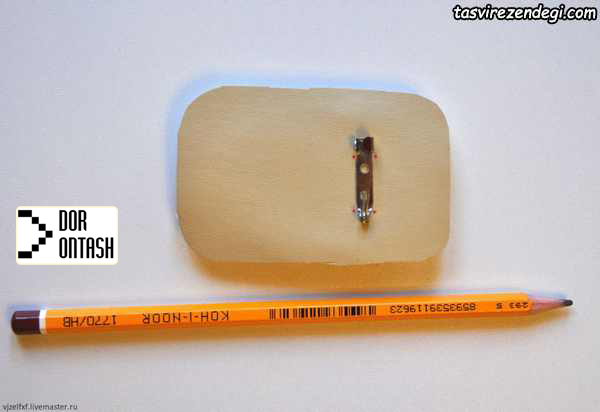 Sew the base of the brooch on a piece of leather and stick the leather on the cardboard with glue.
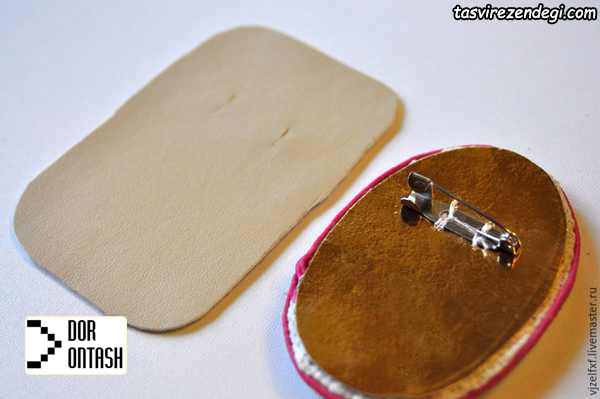 Pass the brooch through the gap you made on the leather.
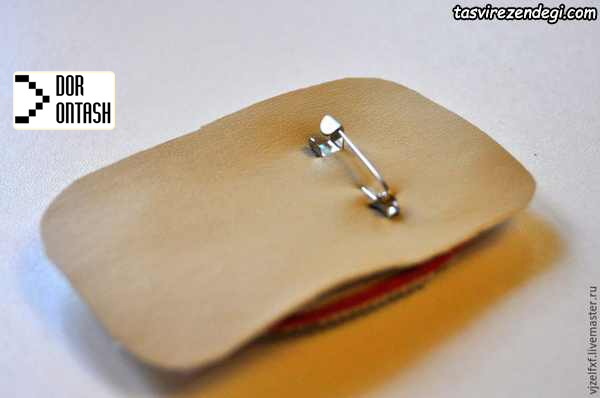 Cut the excess edge of the leather.
Sew a decorative stitch (mouse teeth) on the edge of the leather with beads. Your stitch should be on the braid.
 The sewing method is shown in the pictures.
For more decoration, apply another decorative stitch with a flower of three beads on the previous beads.
 Also our beautiful beaded brooch
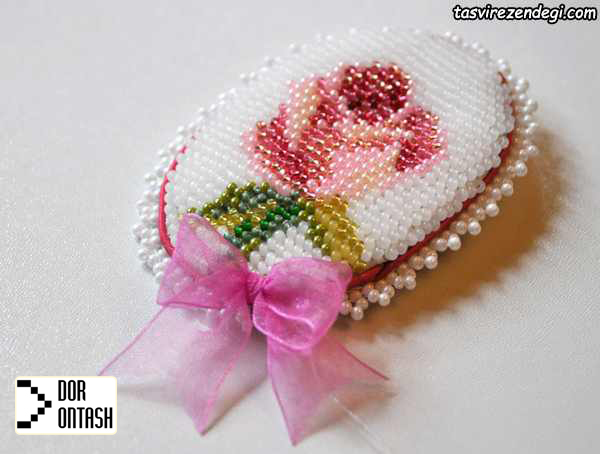
Beadwork training embroidery on fabric step by step
Equipment:
Thin thread of the same color as the fabric
of needle bead embroidery
workshop
of beads and tapestry
method:
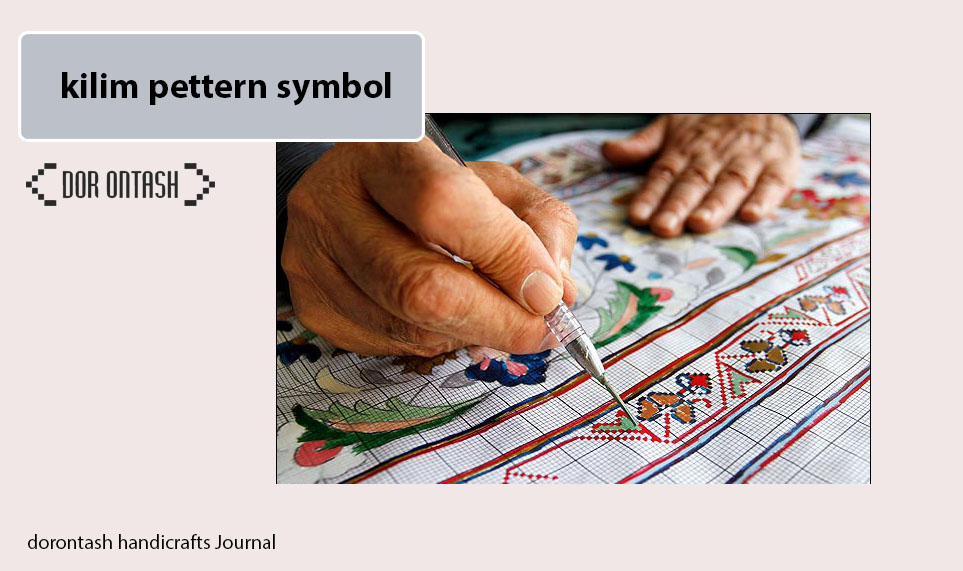
Applying the design on the fabric: The art of bead embroidery is used to decorate plain and patterned fabrics. If you use patterned fabrics such as guipure, there is no need to draw the pattern on the fabric and bead embroidery is done on the fabric patterns. But if you use plain fabric, you should draw the design on the fabric. For this purpose, draw your desired design on oil paper and then transfer it to the fabric using sewing carbon paper.
Fixing the fabric: To fix the fabric and make beadwork easier, place the part of the fabric with the design on it in the workshop.
Bead embroidery on fabric: bead embroidery on fabric is done in different ways such as linear method, solid method, leaf embroidery, fastening embroidery, re-embroidery and embossed embroidery, each of which has its own beauty and is usually used according to the desired design. be. In the following, some examples of bead embroidery on fabric have been taught.
Linear method
Remove the needle from the beginning of the line you intend to sew and insert a number of beads in it.
Insert the needle into the fabric and pull the thread until the bead sticks to the fabric.
Again, insert the needle one or two millimeters further into the fabric and insert the next bead into it.
Repeat the above steps to sew a row of beads on a continuous line.
Toper method
Solid bead embroidery is the same as linear bead embroidery in which bead lines are sewn together to fill the desired surface with these lines.
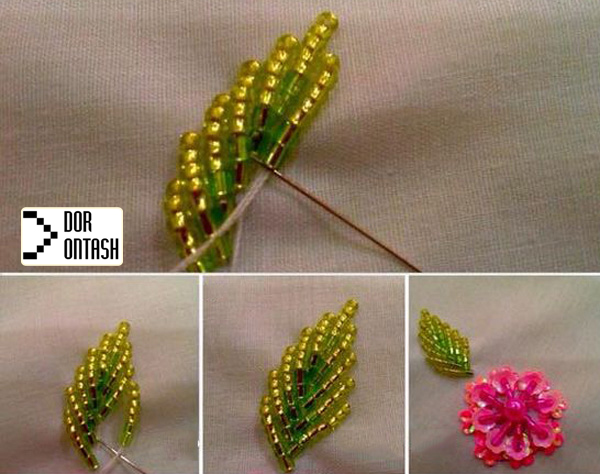 leaf embroidery
Leaf embroidery is done using broken tapestry and used to sew around the leaves in a twill shape. To embroider leaves, do the following steps:
Remove the needle from the fabric and insert the tapestry into the thread.
Insert the needle into the fabric along the length of the tapestry design and pull the thread to secure the tapestry on the fabric.
Now remove the needle from the fabric in the middle of the tapestry and insert the next tapestry into the thread.
Repeat the above steps until the stitching on the desired design is complete.
embroidery
Embroidery is often used to decorate art panels and is actually a linear technique. In this method:
Thread two needles, remove the first needle from the fabric and thread a few beads.
Then remove the needle from the fabric to the length of the beads and pull the thread to secure the beads on the fabric.
Now insert the other needle into the fabric and fasten it on the thread through which the beads passed.
Embroidery again
Remove the needle from the fabric and thread two beads.
After securing the beads on the fabric, bring the needle out from the back of the fabric and through the middle of the beads and pass the thread through the last bead a second time.
Repeat the above steps.
Embroidery again
Embossed embroidery
In this case, two methods can be used to highlight the embroidered beads on the fabric:
The number of beads on the surface to be stitched is greater than the measurement.
He highlighted the design with cotton, glass wool or fibers and then started sewing.
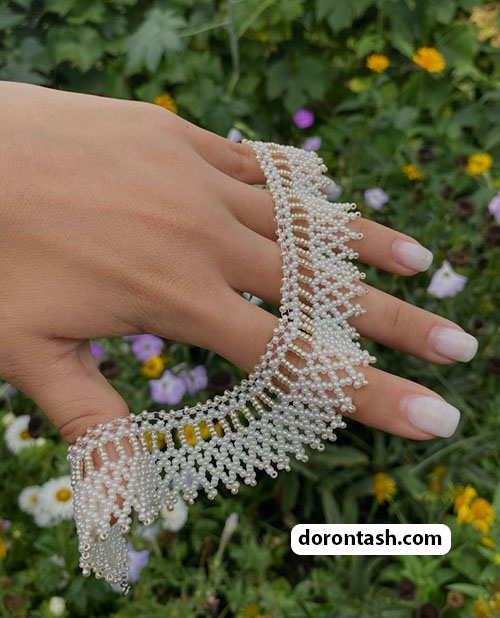
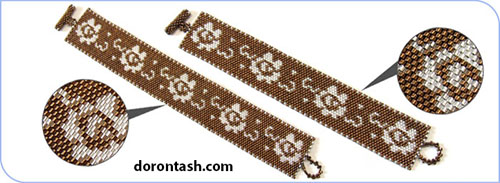
Beadwork training bracelet with a needle
Choose a beading needle. Bead weaving needles are different from regular sewing needles because they are much thinner to pass through the holes of the small beads. Their length is also different. For standard beadwork, it is recommended to use a 2- to 2-inch (5-6 cm) needle. If you’re using knitting machines, you’ll want to use a slightly longer needle, about 3 inches (7.62 cm) long.
If you need to bend while sewing, you may want to use needles that are a little more flexible.
Choose the type of beads. There are also many different types of beads for bead weaving. They come in a number of different colors, shapes and sizes. To choose the right type of bead, you need to determine the project you are creating. For example, certain stitches work better with certain beads. Some of the main types of beads are listed below.
Seed beads are the most common type of beads. They are typically described as small glass beads.
Cylinder grains are uniform in form and usually have straight sides and large holes. If you want to achieve even and smooth beads, these are the best beads to use.
Cut beads look like seed beads. However, they have one or more cuts on the side. This gives them a shiny or sparkling effect similar to a gem.
Magic beads are a combination of cylindrical beads and cut beads. They have six cuts, giving them a spark.
Drop beads are larger beads that look like liquid drops. They have rounded edges and are best seen at the end of a beaded border.
Bagel beads are tubular shaped beads and are mostly used in bead borders.
Choose the right bead. Beads also come in different sizes. Bead sizes are numbered from size 1, which is a very large bead, to size 22, which is a very small bead. The most common bead sizes range from size 15 as the smallest to size 6 as the largest. Size 11 is usually the most commonly used bead size.
Larger beads are best if you have vision problems and are the easiest to use.
Smaller beads are best for intricate detail work.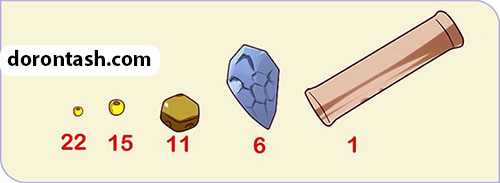
 Condition your yarn. In order to prevent clogging and tearing, you can lubricate your thread using conditioner. Some yarns already contain wax or softener. This will be said on the spool of thread. If you are working with a thread that has not been conditioned, place the thread in the softener and hold it down with your index finger. Then pull the thread along the softener using your other hand. Do this a few times to make sure it’s completely snug.
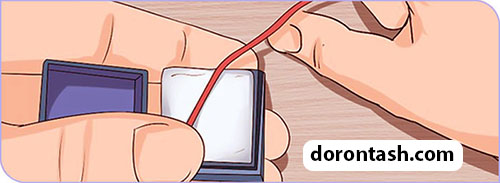
Cover the bead. At the beginning of most beading projects, you should start by placing the cap bead. This will help keep your beads in place so they don’t come off the thread. To insert the cap bead, insert your needle through the bead hole and pull it down toward the end of the thread. Before the bead reaches the end of the thread, bring the needle back through the bottom of the bead.
This creates a loop around the bead and holds it in place. You can place the bead along the thread and place it.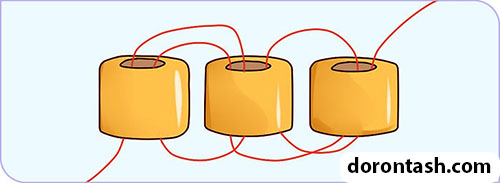
Learn the ladder stitch. The ladder stitch is a basic stitch in beadwork and is typically used to make the first row of other, more complex beading stitches. It can also be used alone to create jewelry or decorations. Start with one cap bead first and then skip two additional beads. Lower your needle, step back from the bottom of the first bead and pull tight. It overlaps the two beads. Then turn the top bead down to secure.
Thread the third bead onto your needle and then bring your needle down through the second bead. Insert the needle from the opposite end where the thread hangs.
Then pull the needle through the bead you just added to secure it in place.
Repeat this pattern until you reach the desired length.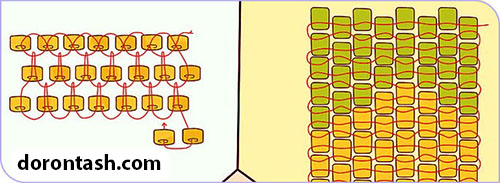
Try other stitches. Once you’ve mastered the ladder stitch, you can learn other basic stitches. For example, try brick stitch, peyote stitch and square stitch. Remember to always use a bead before you start sewing your beads.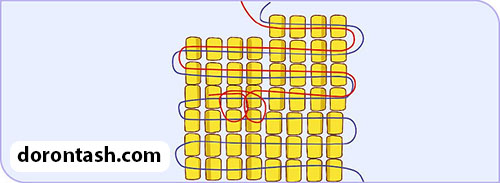
Tie your thread. When you’ve reached the end of your topic, you should shut down your project before continuing. To do this, you’ll want to hide the thread inside the beads already sewn into the project. Remove your needle and sew through a few rows again. Always tie a thread near the center of your project, not along the edges. By doing this, you can make the end of the thread easier. Loop the thread around a few beads to hold it in place, cut the thread and insert it into the project.
Regardless of the type of stitch you are completing, you should use the same method.
To restart, take a new thread and loop it around a few beads before stitching the last bead you worked. Then continue with your project and see the result of your efforts…..
 Capo
Capo
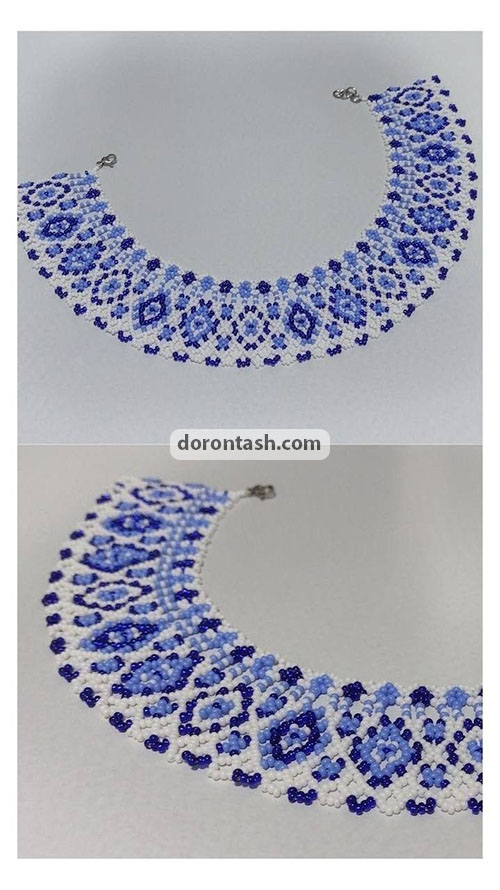
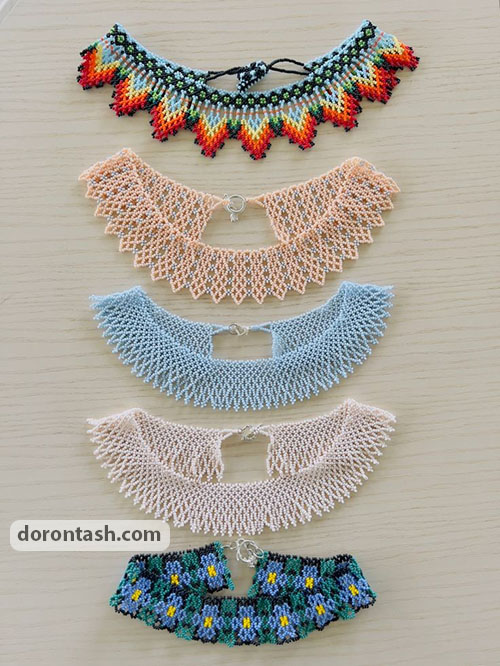
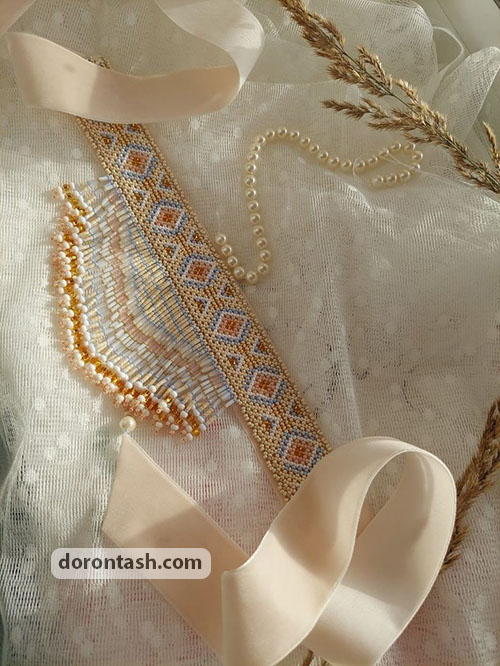
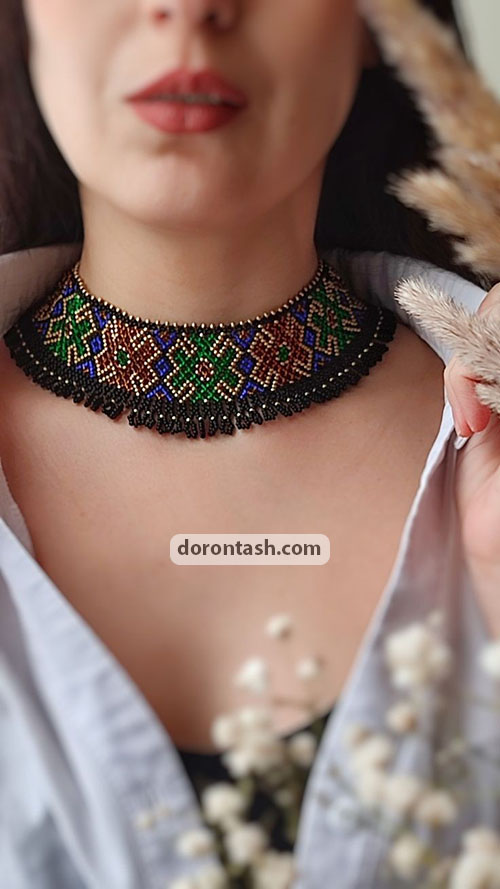
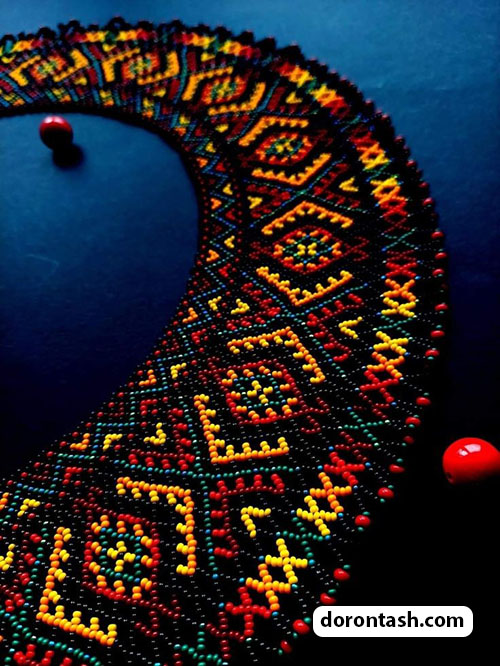
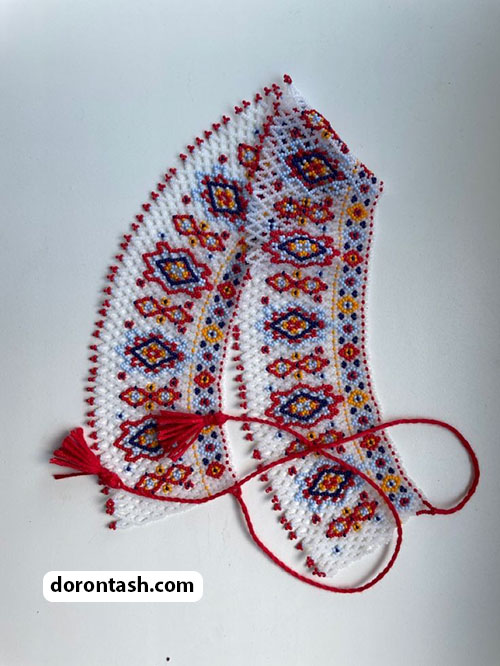
Simple beadwork design

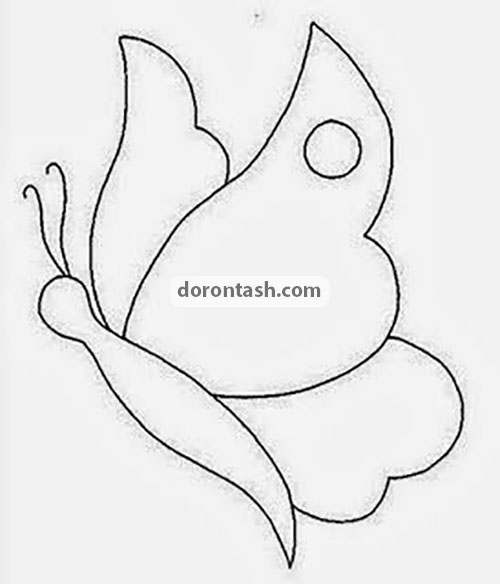
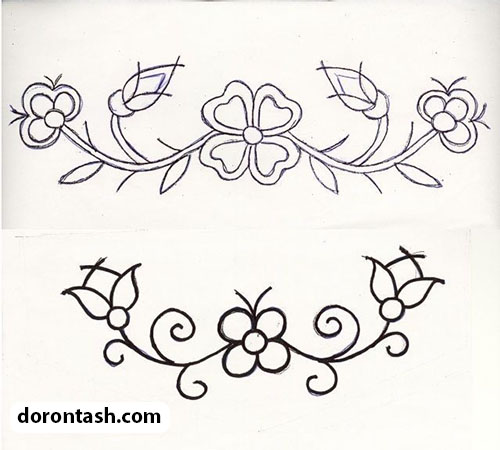
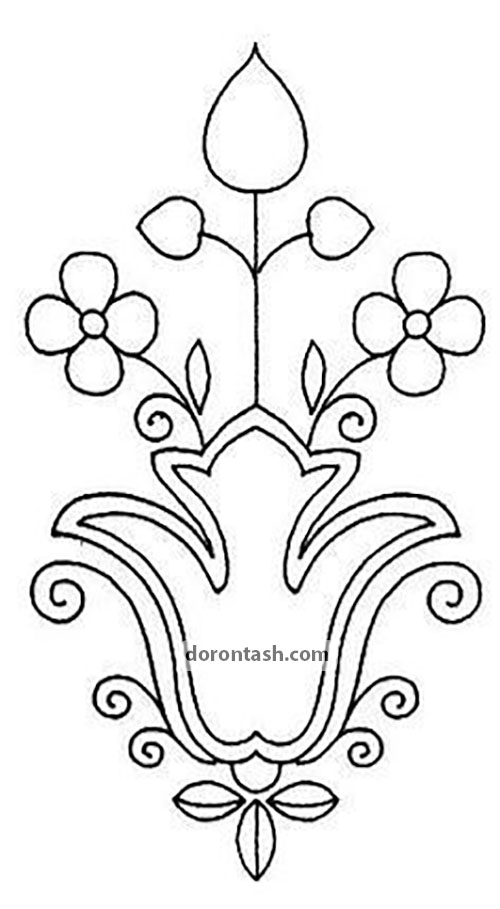
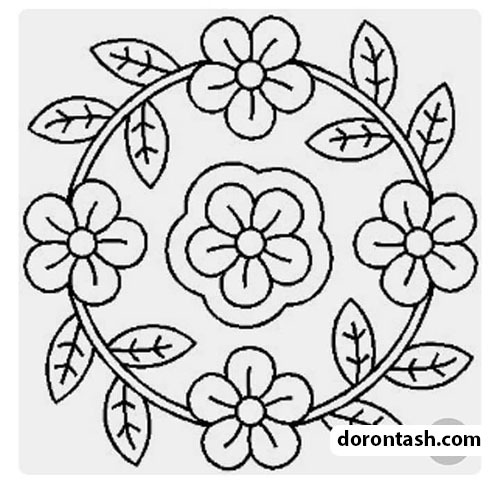
With the above designs, you can start beadwork on clothes at home.
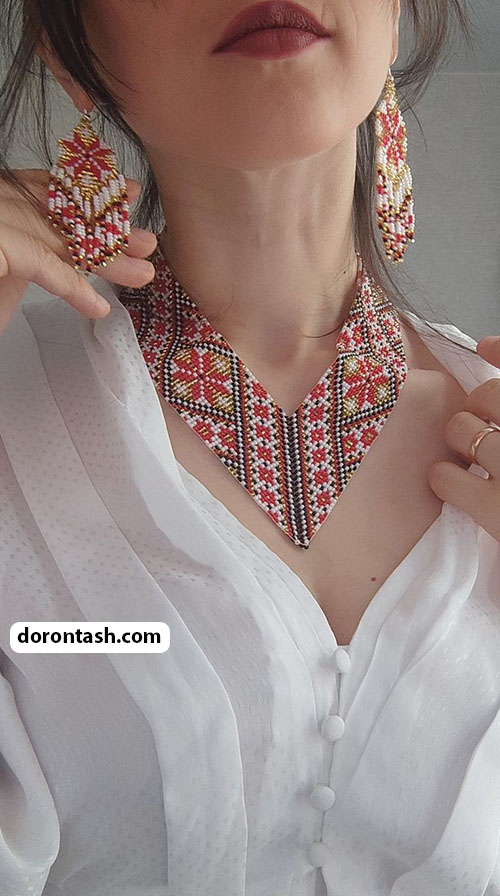
Beautiful pictures of beadwork design