weaving a kilim training at home History of carpet weaving
In this article, we want to learn how to weaving a kilim, but before that, it is better to take a look at the history and how this art was born. Since ancient times, people have had a desire to produce and create products, this issue and feeling of need has led to the creation of handicrafts in every region.
The history of the production of handicrafts in Iran can be related to the geographical conditions as well as the civilization and culture of the people of different regions. The history of Iran has had a great impact on the taste of artists by taking different governments and cultures, as today archaeologists believe that the review and investigation of handicrafts should be started from the beginning of civilization and even before that. According to these cases, a detailed history can be given for each of the authentic Iranian arts and crafts, from working with metals and different inscriptions to pottery and textiles.
In this article, we want to learn how to produce a handmade rug, so stay with us.
weaving a kilim training at home What is a rug?
A rug is a type of woven handicraft with a smooth and lint-free surface, which is made of warp and weft and does not have a long pile carpet. Carpet, which is also called palas, for its texture, the thinner and softer the thread, the better quality carpet we will have. For this reason, wool under the throat and underarms of sheep is used to weave the rug to improve the final quality of the work.
Flexibility, high durability and dyeability are the characteristics that sheep wool has for producing rugs, and it is easier to shape sheep wool for rug weaving. Carpet weaving is a women’s art and is mostly seen in rural and nomadic areas of Iran. 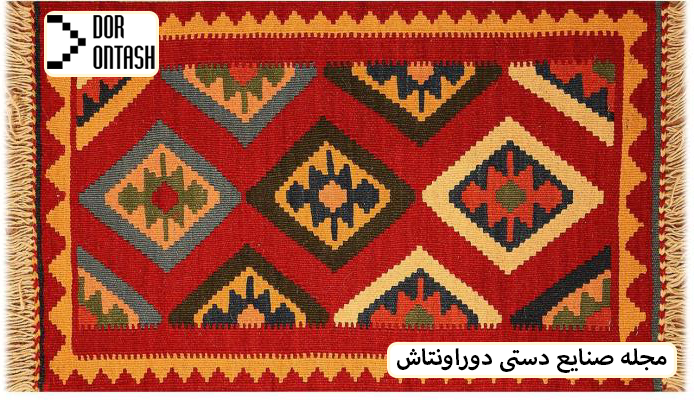
Video of several models of weaving a kilim
weaving a kilim training The time of the creation of the rug
After humans designed clothing for themselves, and over time, they thought of using underlays, and little by little, carpet weaving became popular with the advent of spinning wool.
This art belongs to 2500 years before Christ and the oldest carpet was discovered in this era and among the works of ancient Egypt.
weaving a kilim and handicrafts
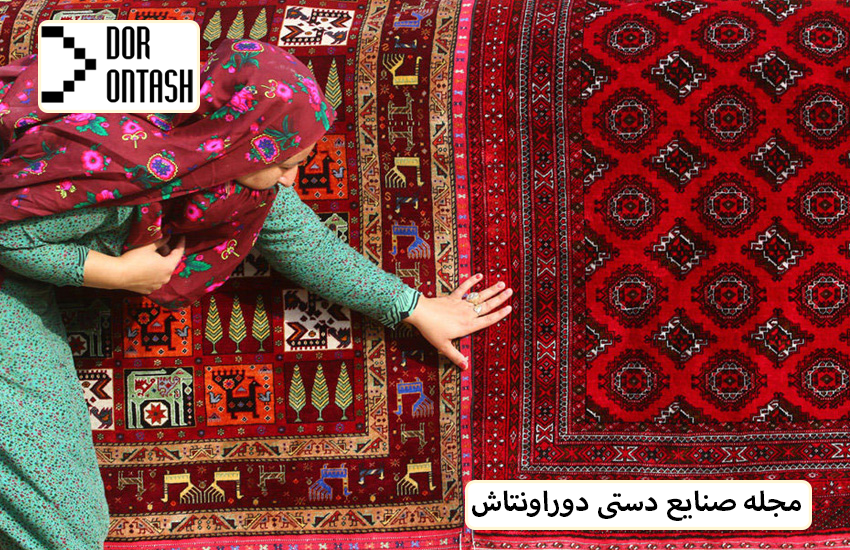
Carpet is considered one of the most valuable handicraft products. When buying handicrafts, one of the famous and best-selling products is always Iranian hand-woven rugs.
weaving a kilim All kinds of rugs
Iranian rugs are woven with many designs and patterns. These designs and patterns are woven either in geometric shapes such as rhombus, triangles, squares and hexagons or in types of flowers, bushes, cashews, domesticated and predatory animals, etc. Most Iranian rugs are woven in Shiraz, Mashhad, Kurdistan, Yazd, Ardabil, Kerman, Balochistan, Azerbaijan and also in our province Golestan.
The rugs of different regions of Iran are classified as Lori, Khamse, Sane, Harsin, Afshar, cloth, Zarand, Baloch, Qashqai, cloth and Turkmen.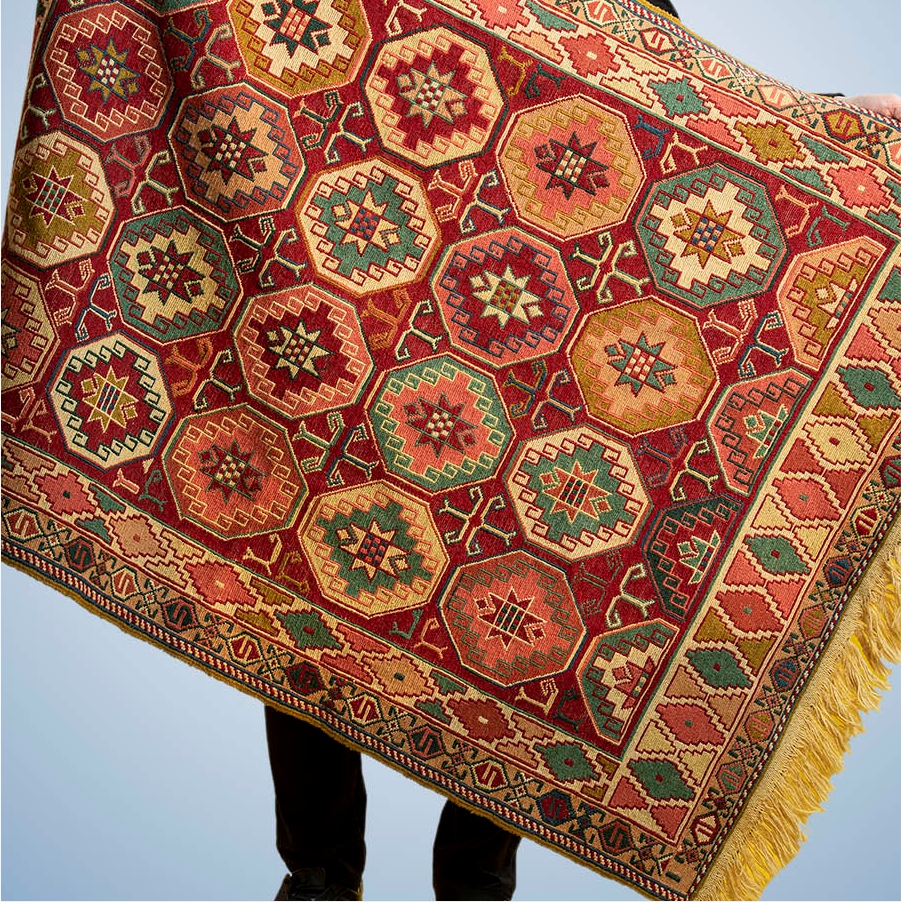
weaving a kilim Areas of carpet texture
In addition to Iran, this hand art is produced in various countries of the Middle East such as: China, India, Pakistan, Afghanistan, Turkmenistan, etc. In our country, in addition to the tribes and nomads, there is this beautiful product in the provinces of Khorasan, Fars, Kurdistan, Baluchistan, Yazd, Azerbaijan, Kermanshah, etc.
Hand-woven carpet is considered a suitable item for organizational gifts
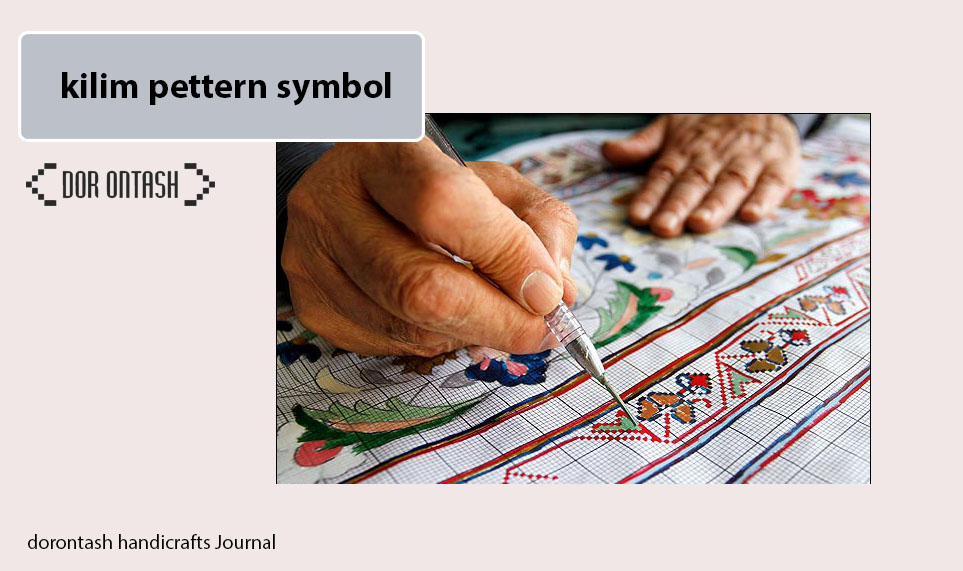
weaving a kilim The map used in the carpet
Most of the designs used in carpet weaving are different geometric shapes such as square, rhombus, hexagon, but not all carpets are woven with this design and many of the designs are based on the mind and the so-called mental design and map, which includes the map. Nature and animals also.
Different designs mostly depend on the areas in which it is woven. And it is different.
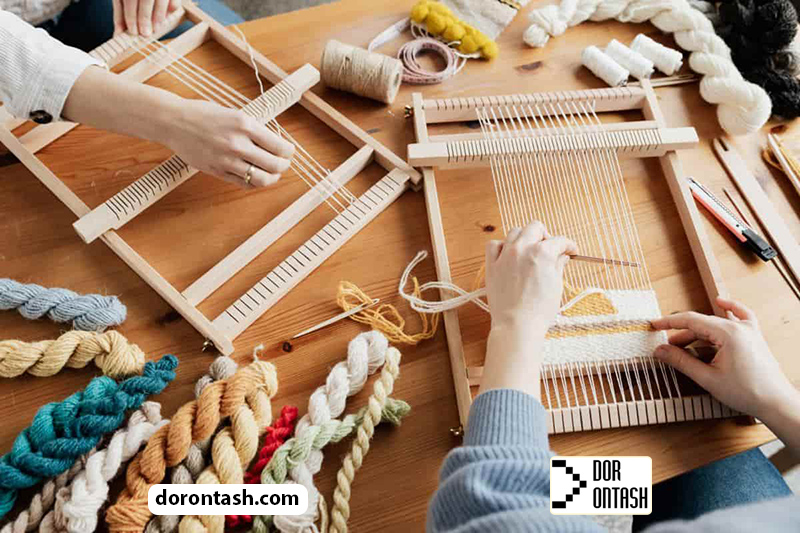
weaving a kilim Steps of carpet weaving
Like a woven rug, a rug needs a carpet hanger to set it up.
After that, it’s time to blacken the carpet.
And with the help of woolen threads, the weaving is started by hand and the weaver implements the patterns on the carpet.
weaving a kilim with raw materials
Carpet yarn is woven from the beginning with cream or natural sheep and goat wool yarn, but with the passage of time, cotton yarn and synthetic yarns such as acrylic, chrome, etc. are also woven. But in principle, the material that should be used for weaving the rug is natural wool.
It is a flat woven rug. The woven rug has two sides, the back and the top are exactly the same. The threads or threads in the carpet are completely parallel and without an angle. In general, Dari braids can be placed in three categories.
1: Weaving weaves whose design and color are created by chele cheles, and Jajim and Plus are from this category.
Two: weft-like weaves whose design and pattern are created by the weft and the thread is not visible in any way, the rug is one of these weaves.
And the third category, the design and pattern is created by twisting colored creams around the threads in the form of a chain.
In the carpet, the weft is loosely and wavyly twisted around the threads in a zigzag pattern and turns upside down between the threads and completely covers the thread or the chela. that if we work all the weaves with the same thread thickness, the carpet will be the softest and almost like cloth.
weaving a kilim Hand-woven rug embroidery tutorial
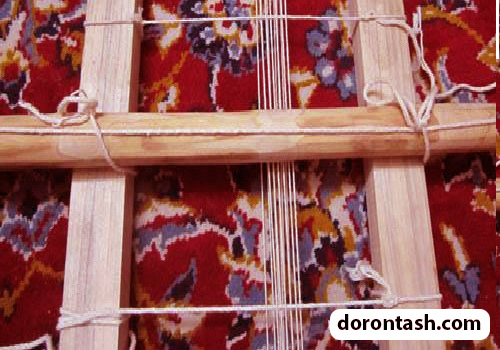
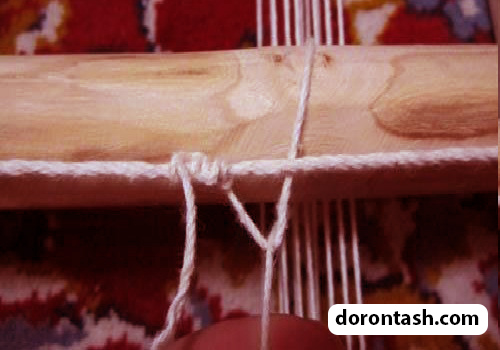
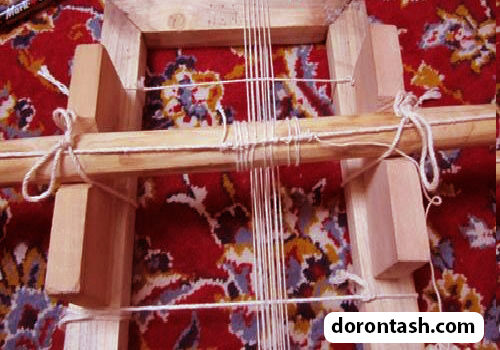
First of all, the koji wood should be prepared. For this purpose, we take a round stick bigger than the width one and groove both ends of it.
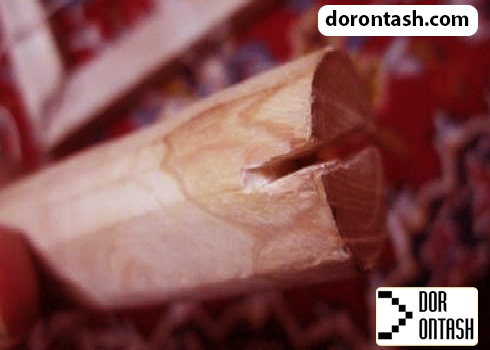
We choose a thick thread and tie a few knots on its head and put it inside one of the grooves and pull it until it is tight. The knot that we tied makes the thread stay firmly inside the groove and doesn’t come out…
We continue to stretch the thread and take it to the other groove and place it inside it. The thread should be pulled tightly so that it does not hurt when tying Koji…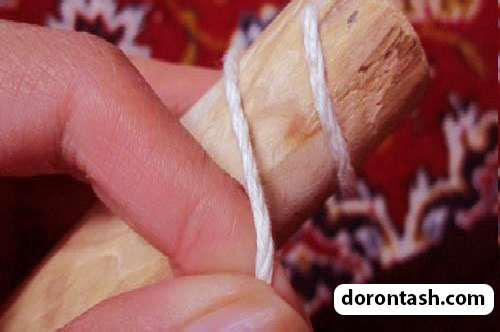
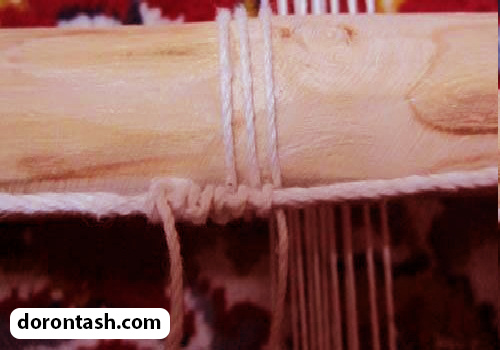
Now, to tighten the thread, wrap it around the wood and…
And at the end we tie a tight knot.
This is a ready koji…we call this thread koji connecting thread. To make sure this thread is correct, we pull it upwards and release it. If it makes a sound, it means the court…
We place the stick between two connecting threads and tie both sides with a strong thread.
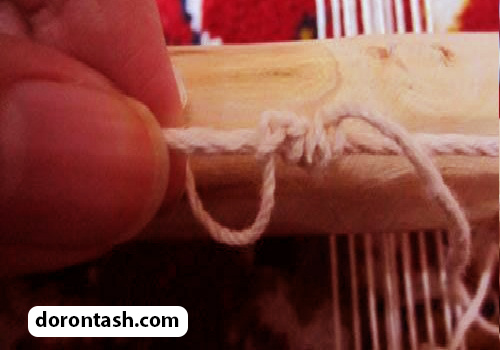
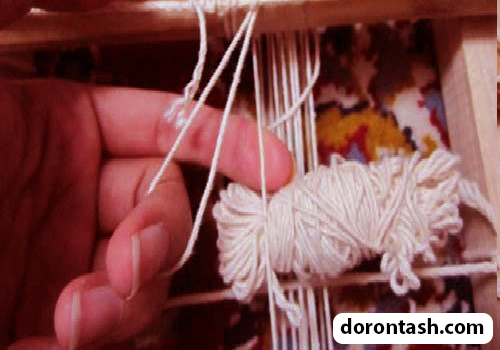
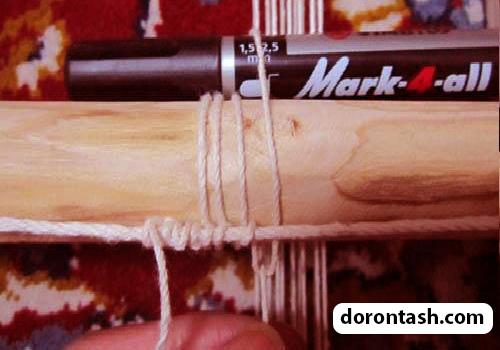
Now it’s time to tie the koji… we take a long thread with a thickness greater than the chele thread and tie its end to the connecting thread of the koji.
 We take two index and side fingers under the koji connecting thread and take the koji thread.
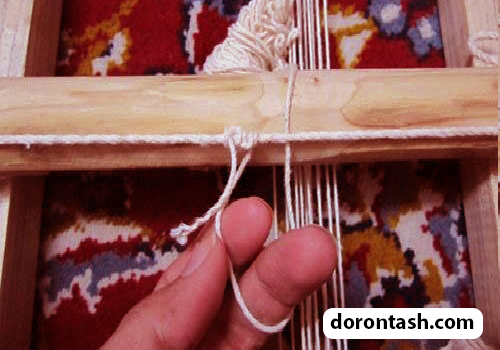
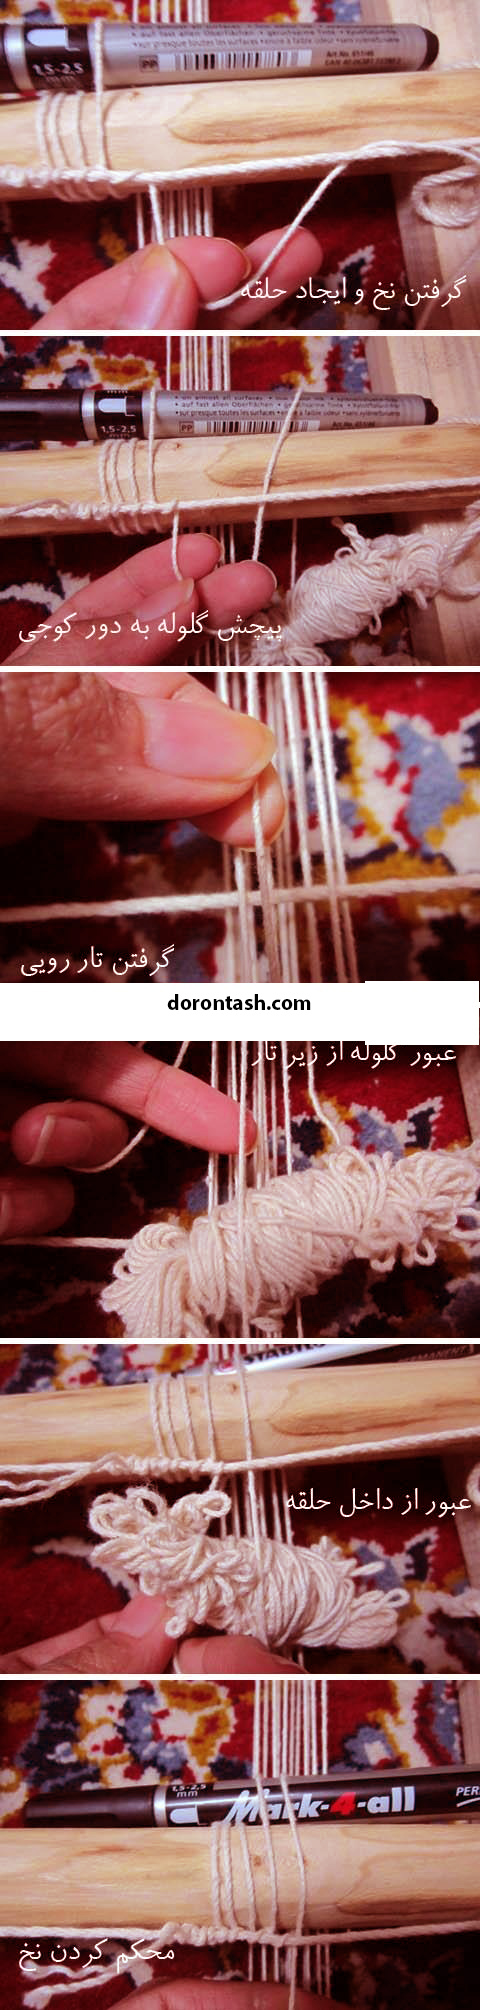
 We pull the thread downwards to create a loop.
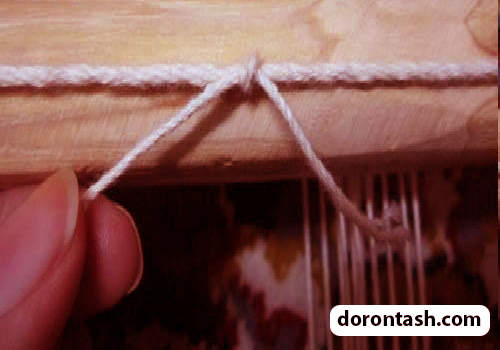
He took the ball of thread into the ring from above and…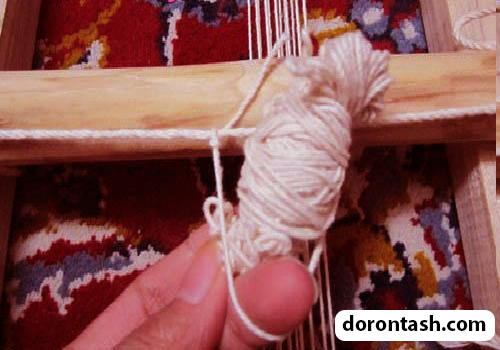
And pull tightly until the knot is closed.
 We repeat this a few more times.
 Again, in the same way as mentioned, he made a loop, but this time he moved the thread ball to the back of the stick and…
 And we go down.
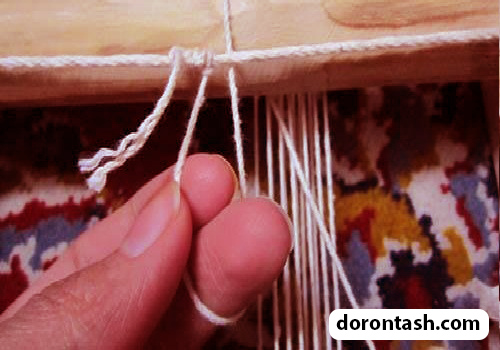 And then we pass under the ring and inside it.
 We tighten the ring knot.
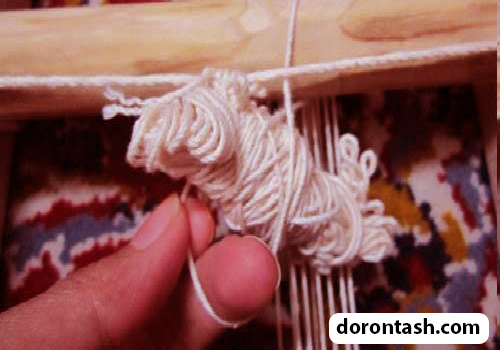
 We repeat this method several times. These are the first steps to strengthen the koji. You should make sure that by the time these steps are completed, we will have reached the beginning of drawing.
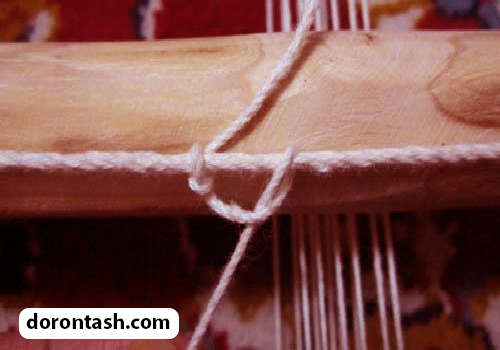
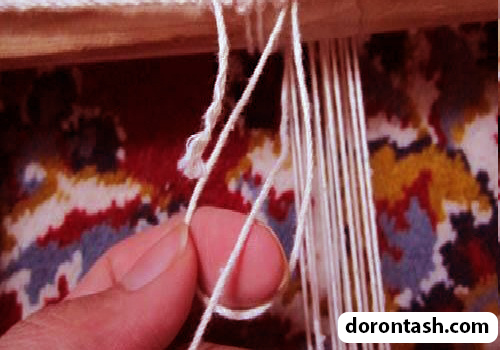
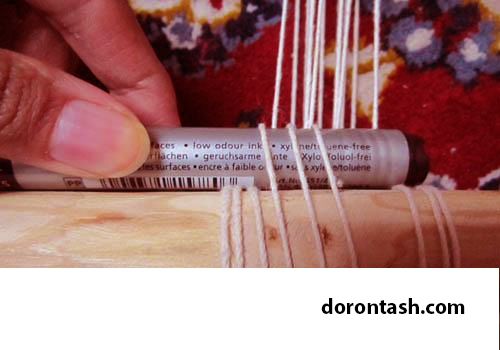
Now the principle of work… as in the previous steps, he made a ring, wrapped the ball around the stick, but this time, before taking the ball into the ring, he first passed it under the first wire and…
 And then we go out from inside the circle.
 Before we fasten the thread to the koji, we put a round tool like a magic stick on the koji stick and under the ring we created and then fasten it. You will understand the role of magic later.
 If you look carefully, you can see from the back that the first rope is attached to the koji wood. Make sure that the threads you choose to connect to Koji in order are the threads on the first connecting thread…that is, we have nothing to do with the threads below this thread.
Here, make sure that the thread is connected to Koji. For convenience in this task, you can place a flat device with a thickness of about half a centimeter under the koji wood and then tie it to the gallows. You can also use folded cardboard.
 Now I will review this step once more…
 And continue again…
follow this method until the end until all the threads on the first connecting thread are connected to the koji wood.
At the end, as in the first work, the rings are wrapped around the wood and…
And then we tie the knots. If you run out of thread during work, you can take a new thread and tie it to the end of the previous thread and around the koji connecting thread and continue the work.
At the end, we slowly pull out the magic.
You can see that the size of the rings are bigger.
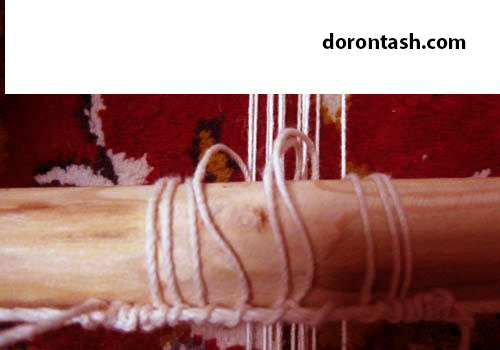
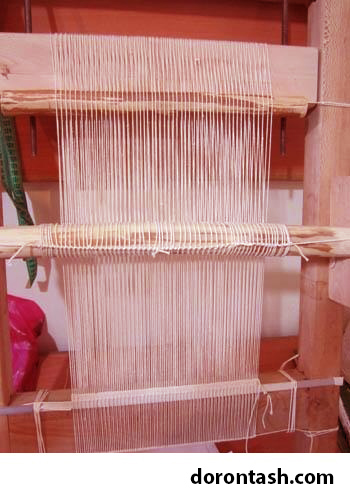
Now we take two pieces of wood, which we call under the koji, and place them on both sides of the koji and under it, and fasten them to the gallows.
As you can see, the extra loops that we tied with the help of a marker created a gap between the upper and lower threads. If you look carefully, only the upper threads are attached to the Koji.
This is the end of Koji closing. At first glance, it may seem difficult, but by closing and opening it a few times and making mistakes, you will learn well.
After the koji, there is the underlay and finally the texture
 First of all, you must have a ready-made loom for carpet weaving, which we learned academically in university, and it is possible that they work in a different way. (Usage of Koji)
This hanging is done
 If you let them out, it has an infrastructure… like this
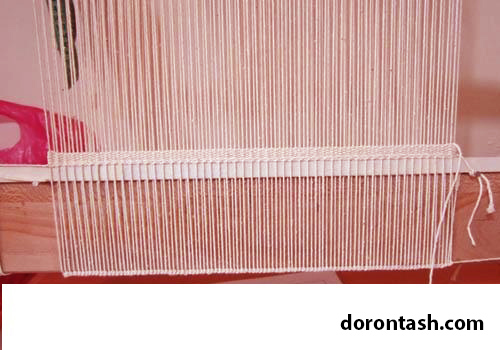 Of course, you can do it yourself, which has its own training. I think most of you are familiar. It is like the first work of carpet weaving.
This is also a visual tutorial… This type of texture is called a simple rug, which can be made with different colors on top of one another, a colorful striped rug. Those works that are planned have their own training. That type of work is a grooved carpet, the way it is woven creates patterns.
Of course, you can do it yourself, which has its own training. I think most of you are familiar. It is like the first work of carpet weaving.
This is also a visual tutorial… This type of texture is called a simple rug, which can be made with different colors on top of one another, a colorful striped rug. Those works that are planned have their own training. That type of work is a grooved carpet, the way it is woven creates patterns.
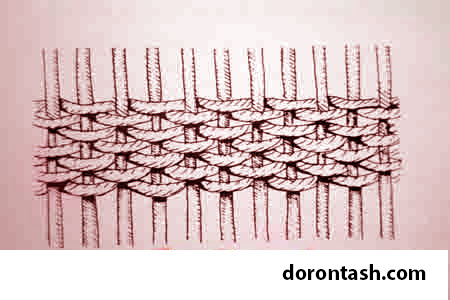
This is a simple texture pattern

After finishing weaving and chaining, in order to lower the rug from the surface, we mark the place of cutting the chelas with a marker parallel to the end of the work and loosen the chelas a little. From different parts of the cutting site (beginning, end and middle) we start to cut the chelas alternately in several groups. This multi-step cutting will ensure that there is no pressure on the rug when cutting the chelas And to avoid mixing the regular dimensions of the rug.
After finishing the weaving and shearing of the rug, the beginning and end threads that are cut a little longer than the rug are alternately cut in several bundles and tied together in different ways. This action not only strengthens and prevents From the simple collapse of the weaving on both sides, it becomes a rug, but it also adds to the beauty of the rug. At the end, we pick and take the extra lint and threads from the back and top of the rug.
In this article, we tried to share with you what is necessary about teaching weaving a kilim. I hope it was useful for you.