Papier Mache

What is papier mache and what are its uses?

How enjoyable it is to create something that is the result of your creative ideas and you have created it with high excitement and energy. These crafts can be created from anything. Experiences that have been and remain with us since childhood.

Now, most of us have experienced the joy of creating papier-mâché masterpieces. But what exactly does this phrase mean and where does it come from? Papier-mâché, sometimes spelled Papier-mâché, is actually a French phrase that originally meant chewed paper.

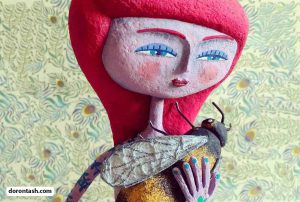
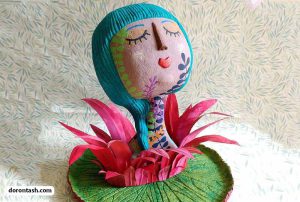
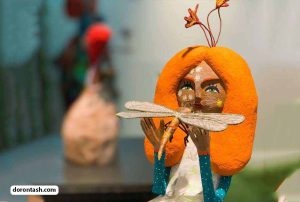
As a result, this phrase carries with it the concept of simple childhood crafts. Papier-mâché is actually an original and old art that can be seen in different shapes and dimensions. In a way, a lot of primary material can be used to create papier-mâché works of art, and this adds more variety and attractiveness to the works of art in this sector.

If you are not familiar with this beautiful art, join us here to introduce the art of papier mache, how to do it and the different characteristics of this lovely art. To begin with, it is better to start with the history of Papier-mâché.

What is the history of Papier Mache?

The beautiful art of papier mache has been with us for years. In fact, it is better to use the word centuries instead of years, because this art has existed among humans for centuries and its popularity is very high.

The ancient Egyptians used the art of papier mache in making coffins and death masks. Of course, at that time the art of papier-mâché was not like what we know now. They used layers of papyrus covered with plaster and linen to create their masks and coffins.

But to introduce the first place where the art of papier-mâché began its work, we must mention China. Shortly after learning how to make paper, they used it in the form of papier-mâché art to make items such as their war helmets, boxes and masks.

Papier mache art has a very long history in Iran. Most of the handicrafts and old artworks of ancient Iran are derived from this lovely art. Beautiful trays and dishes inspired by Papier-mâché art were made in Iran. In other countries, such as Japan and India, this art was used to decorate war tools and armor.

Gradually, the art of papier mache spread and became known all over the world, including Europe and America, as a decorative and very attractive art. Currently, this wonderful artistic technique is used in many different fields.

iran handicrafts

What are the advantages of Papier Mache?

Papier mache art has many advantages. The most important advantage of this art and the reason for its popularity is that to create a beautiful work of papier-mâché, you don’t need very complicated tools and equipment, and you can create any model with a very simple and accessible tool.

This art is very affordable and can be the choice of a wide range of people and art lovers. Another important advantage of papier-mâché is that it uses simple and disposable materials. Therefore, it can be said that it is a kind of recycling approach to use waste paper in the best possible way.

This art gradually became a very strong and durable industry among various other arts, many of which are immersed in very expensive tools and equipment. A style that can be followed in different places.

What materials are used in pipe art?

Different materials can be used in different papier-mâché art projects. A completed work in this technique can consist of pieces of paper or of dough. Other combined materials are used along with this paper and pulp, which usually includes fabric and other materials. These compounds are used to strengthen the model and make it more beautiful.

The paste used in papier-mâché art can be made from water-based glue, starch, or wallpaper paste. For example, ordinary white glue can be mixed with enough water to create a paste with the consistency of thick cream. If you wish, you can use a dough made from a mixture of water and flour or starch.Papier Mache

How to create a papier-mâché project?

Once you have a basic dough to work with, all you need is some paper and an idea to get started. Here, the paper should be cut into thin strips. Newsprint is usually used for this step of the work, because it is cheaper and more affordable, and most importantly, it works well. Then, thin sheets of paper should be inserted into the dough and soaked.

After the paper strips are completely saturated with the paste (that is, they are completely wet), you should place the papers on the surface you decide to use to create your masterpiece structure. At this stage of the work, various items can be used as a base level.

Common items that are used as a base in a papier mache project include balloons, light bulbs, wire mesh, and the like. Place the paper strips on the intended surface and actually stick them and allow the paper strips to dry slowly. After the model is completely dry, you can do the necessary delicate work on the model.

The next stages of working in papier mache can include making a series of cuts, sanding and painting. In this way, the desired model will gradually approach the masterpiece you had in mind, and finally a very beautiful work of art will appear for you.

Of course, in another method of creating a papier-mâché style model, you can use the same paste created with the help of paper. Many shapes and sculptures can be created by shaping this flexible dough. Then by decorating and painting the models, he created a creative and very beautiful work of art.Papier Mache

Papier mache is done in two ways:

A- The first method: Shred newspaper or waste paper.
Prepare a suitable container with a mixture of water and wood glue.
Soak the shredded newspapers in this mixture.
Paste these materials on the main skeleton of the work.
The skeleton can be wire or made of thick cardboard.
Carefully shape the soaked newspapers over the skeleton.
By adding newspaper and thickening the layers, the skeleton will not be seen.
In this way, only a view of the newspapers is exposed.

B- The second method:

Making papier-mâché paste from waste newspaper and then shaping this paste, which can lead to making the final sculpture.
• To prepare this paste, grind the newspaper completely.
• Pour water in a suitable container and place the newspaper in the water, it is better that the water covers the newspapers completely.
• Put the container on heat and boil for 30 minutes.
• After cooling, put these ingredients in a blender until it becomes a smooth paste.
• Now it is necessary to put this dough on heat again so that the remaining water is removed and it forms a dough.

Proceeding is very simple.

• It is enough to add a quarter of a cup of wood glue to the dough and grease your hands with brazak oil and pour a spoonful of oil into the ingredients.

• Now knead the dough with greased hands, until the glue is evenly mixed with the newspaper and a soft and smooth dough is obtained.Papier Mache

Introducing beautiful ideas for papier-mâché art

As it was said, considering the wide application of this very simple and beautiful art, many ideas can be considered for it. According to the field of application of this art and the tools you have, you can use attractive and creative ideas.

For example, wet paper strips can be glued around an inflated balloon. After the paper strips have dried and taken the circular shape of the balloon, it can be shaped and sanded and painted to create a human head model.

Papier mache art is also used in the production of paper boats. Here, in addition to large paper layers, fabrics and wooden strips are also used in the key points of the boat to strengthen the structure of the created model. Finally, a waterproof and very light boat is created, which, in addition to beauty, can be a good alternative to heavy wooden boats.

Teaching and learning sculpting with papier mache

Since this beautiful and diverse art can be the basis for very diverse and unique ideas and the tools and equipment needed to do it are very affordable and available, teaching and learning how to make papier mache sculptures It can have many advantages.

In these trainings, in addition to the methods and techniques of doing this work, creative ideas are also taught so that creative students and artists can leave behind the most beautiful works of art. Most importantly, they can use these skills in many professional fields and generate income.Papier Mache

How to make paper pulp for making sculptures 

  1. Make lots of paper strips using newspaper.
    To make enough paper pulp, you need enough paper strips.
  2. Cut these strips of paper into smaller pieces of about one to two centimeters.
    It is better to fill at least a quarter of the bucket using paper scraps.
  3. Gradually add hot water to the bucket to cover all the paper crumbs.
    Let the water cool slowly;
    Because the cooling of the water dissolves the pieces of paper inside it and penetrates the paper fibers.
    After cooling the dough, stir and mix. It is suitable to use a wooden spoon to stir the dough.Training sculpture
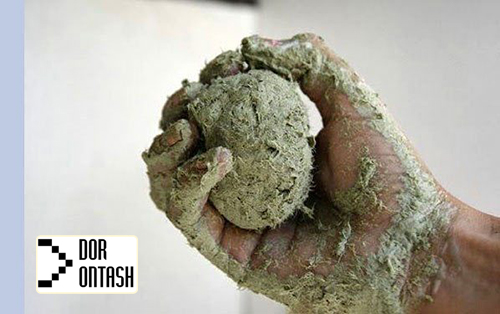
 

Teaching sculpting with paper pulp 

4. To get the right paper pulp, it is better to divide the obtained mixture into small pieces
and then pour these pieces into the blender so that you can prepare a loose and uniform paste.
5. After that, put the dough in a basket and press it by hand to remove excess water.
6. In the last step, you need to add one cup of PVA glue to the resulting mixture.
Now the paper pulp is ready and you can use it to make beautiful sculptures.
If you don’t want to use it right now, you can keep this dough in a closed container in the refrigerator or freezer for a few days.

By using  the paper pulp  obtained in the previous step, which is very flexible and has a high formability, you can use it to make your desired sculpture or shapes and make very beautiful and extraordinary handicrafts.

Sculpture is also considered as a handicraft. If you are going to buy handicrafts, sculpture can be one of your choices.

Steps of sculpting with paper pulp (papier mache)


  • Pour a layer of paper pulp into the mold and press it gently to make it smooth.
  • With pressure, air bubbles and gaps in it will disappear.
  • Repeat this until your sculpture reaches the desired depth.
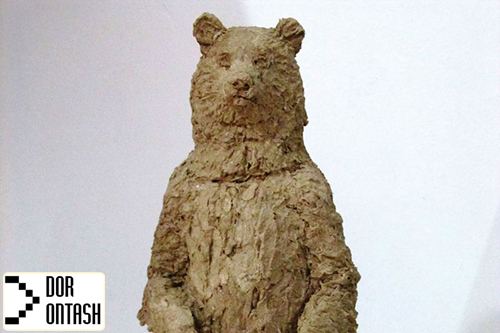
Training sculpturePaper pulp sculpture mold

  • Then give the mold a chance to dry.
  • This period of time is different for sculptures with different thicknesses;
  • After that you can remove the template.

At the end of the sculpture with paper pulp


Finally, you can design the sculpture made of paper pulp using beautiful coloring and decorations and give it an effect. You can make beautiful and unique decorations using paper pulp.

Such as: beautiful decorative objects or candle holders and even some dishes and bowls with very beautiful designs and forms.

Leave a Reply

Your email address will not be published. Required fields are marked *

Fill out this field
Fill out this field
Please enter a valid email address.
You need to agree with the terms to proceed

Menu